Multiple environments supported
libp2p has multiple implementations and they all interop with each other. At the time of writing, libp2p has 7 native implementations:
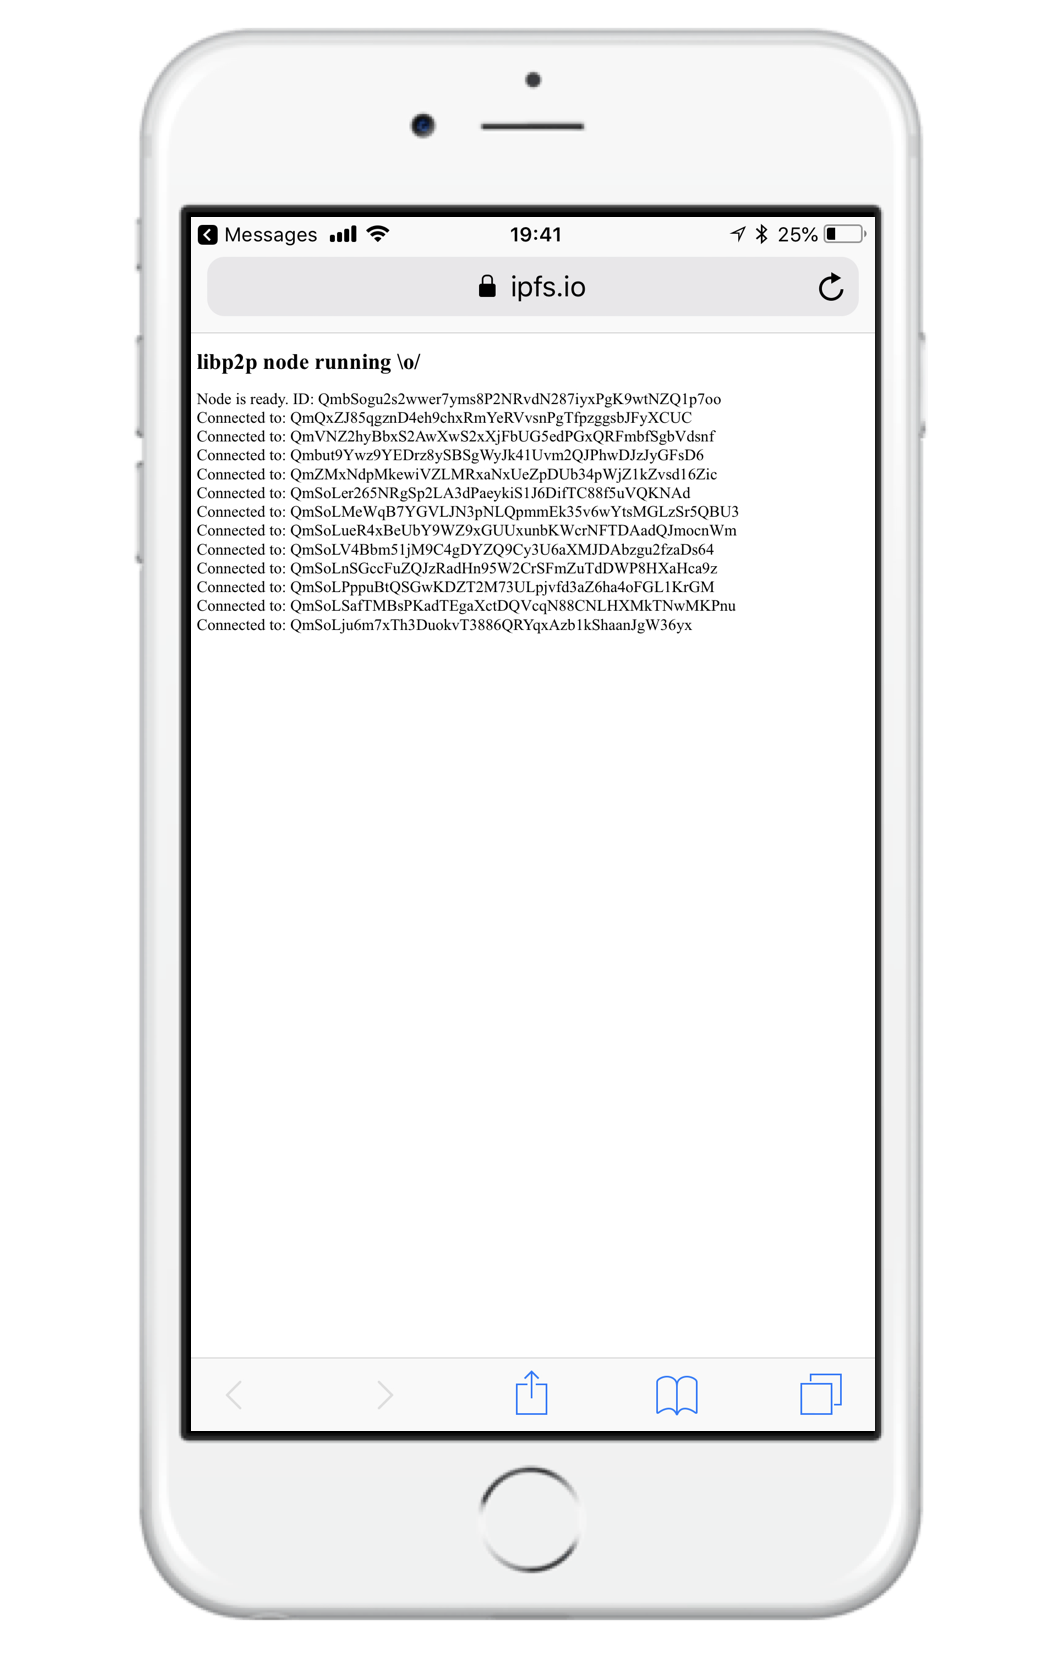
Browser support
The JavaScript implementation of libp2p works in browsers and mobile browsers too! This is very important because it enables applications to run libp2p on the desktop and mobile devices as well.

As a modular networking stack, libp2p is designed to be able to suit a variety of project needs. The configuration of libp2p is a key part of its structure. It enables you to use exactly the features you need, and only what you need. For example, it can configure libp2p modules such as libp2p-tcp and libp2p-websockets. And you only need to change a few lines of code in the libp2p configuration to go from the NodeJs version to the browser version.
Let's take a look at what a NodeJs libp2p configuration would look like, using js-libp2p version 0.30:
'use strict'

const TCP = require('libp2p-tcp')
const MulticastDNS = require('libp2p-mdns')
const WS = require('libp2p-websockets')
const WebSocketStar = require('libp2p-websocket-star')
const Bootstrap = require('libp2p-bootstrap')
const KadDHT = require('libp2p-kad-dht')
const Multiplex = require('libp2p-mplex')
const { NOISE } = require('libp2p-noise')
const libp2p = require('libp2p')
const defaultsDeep = require('@nodeutils/defaults-deep')

const defaultConfiguration = {
  modules: {
    transport: [TCP, WS, WebSocketStar],
    streamMuxer: [Multiplex],
    connEncryption: [NOISE],
    peerDiscovery: [MulticastDNS, Bootstrap, WebSocketStar.discovery],
    dht: KadDHT
  },
  config: {
    peerDiscovery: {
      mdns: { enabled: true },
      bootstrap: { enabled: true },
      websocketStar: { enabled: true }
    },
    dht: { kBucketSize: 20 }
  }
}

module.exports = async (options) => (
    libp2p.create(defaultsDeep(options, defaultConfiguration))
)
The first part imports all the necessary libp2p modules that make up this network stack.
The second part is the libp2p node configuration where we add the different modules for each part of the network. In this configuration we are using transport, streamMuxer, and connEncryption, which are required for all libp2p nodes, as well as the optional peerDiscovery and dht modules.
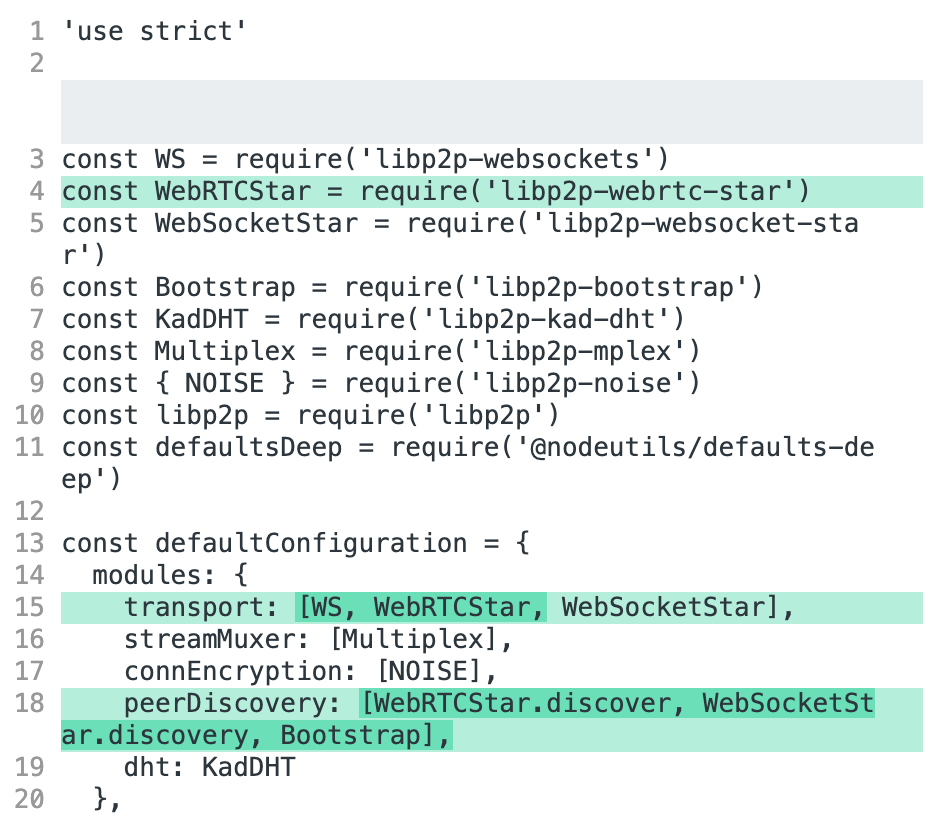
For this code to run in the browser, which doesn't support TCP transports, we only need to change the transport protocols and peerDiscovery protocols in our libp2p configuration. No other changes in the application are required!
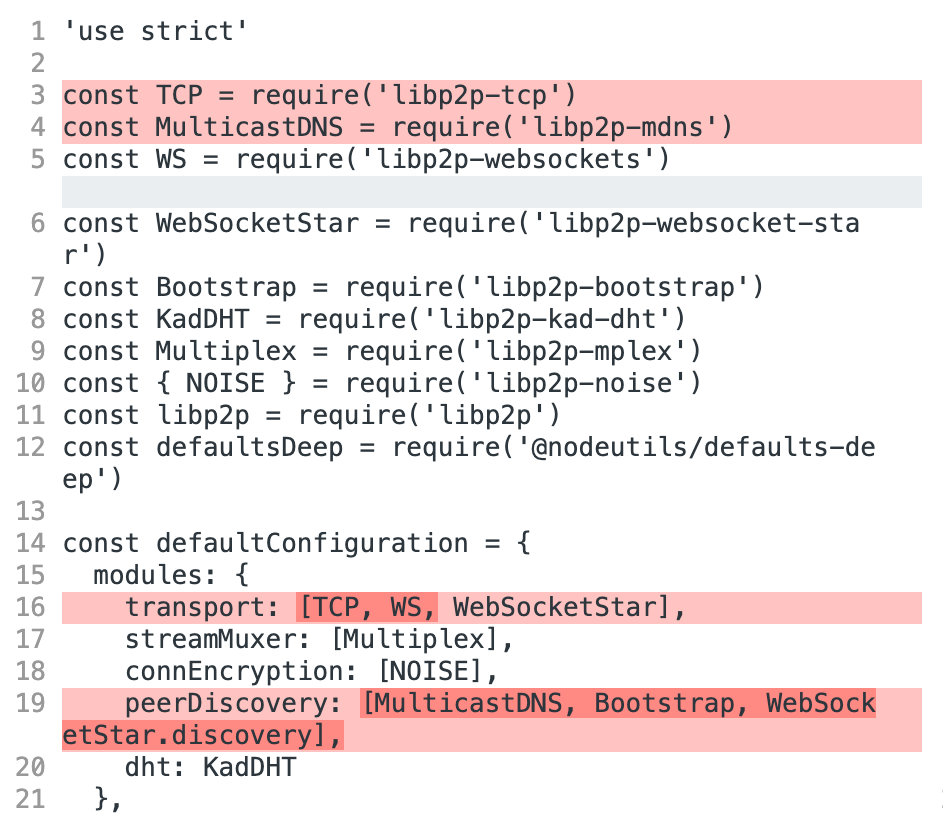
 `TCP` and `WebSockets` in `transport`; `MulticastDNS` in `peerDiscovery`
`WebSockets` and `WebRTC` in `transport`; `WebRTC` derived discovery
`TCP` and `WebSockets` in `transport`; `MulticastDNS` in `peerDiscovery`
`WebSockets` and `WebRTC` in `transport`; `WebRTC` derived discovery
In this example, we only had to change very few lines of code to configure a libp2p node that runs in the browser. The simplicity of editing configurations to adapt to new environments is one of the key advantages of libp2p.
Take the quiz!
What environments does libp2p support?
Feeling stuck? We'd love to hear what's confusing so we can improve this lesson. Please share your questions and feedback.